Lets assume, your website is example.com and you want to create a test page. You can create a subdomain. Let’s say it test.example.com.
However, many people get confused between a subdomain and a subdirectory. Let’s clear out that first here:
test.example.com is a subdomain.
example.com/test is a subdirectory.
Now, we will walk you through the process of creating a subdomain. Follow these simple steps.
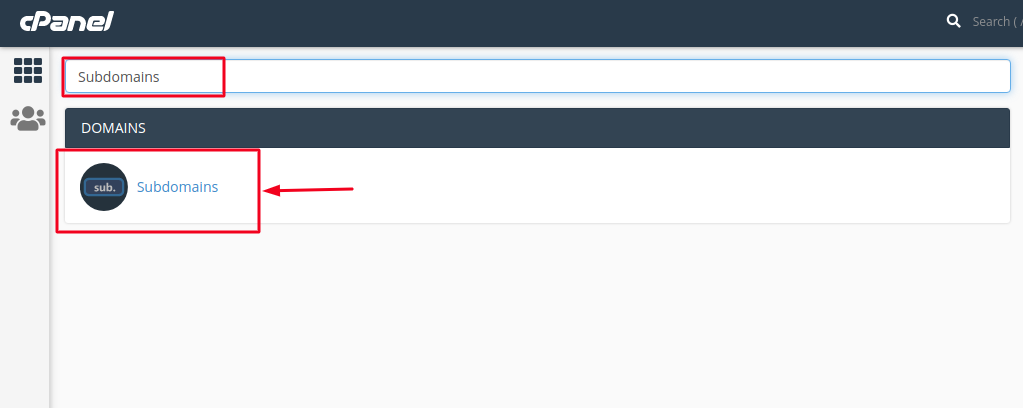
- Log in to your cPanel account and search for “Subdomains” and click on it as shown below:
- A new tab will open for you which will directly guide you to add the subdomain’s details.
Taking the earlier mentioned example, test is for subdomain and example.com is the root domain. You can also choose the Document Root but if you don’t know about it, leave it as it is.
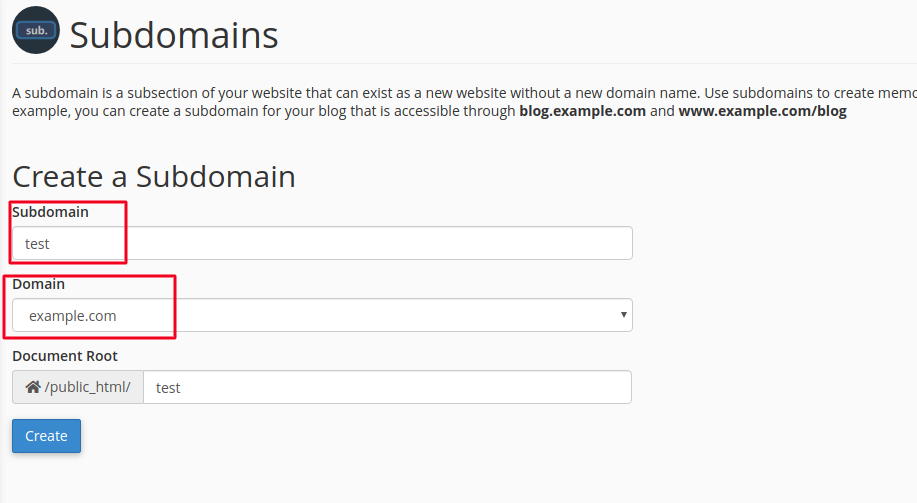
Depending on the number of websites you host at your web hosting, you can choose the root domain from the drop-down menu.
Once you do it, click on the Create button.
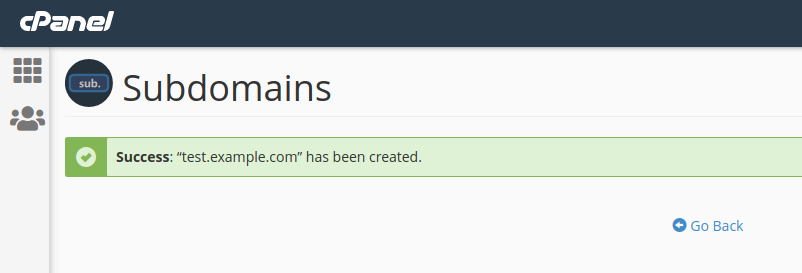
- Once you click on the create button, the page will get refreshed and you will see the subdomain. A message will appear to notify you that the subdomain has been created.
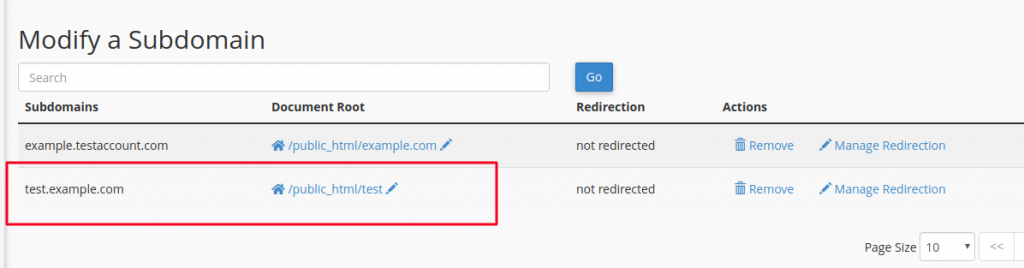
- To verify if the Subdomain has been created correctly, you can click on Go Back button and it will take you to the subdomain’s management page where you can see the current subdomains which have been created.
- Scroll down a bit and check the subdomain you have just created. If you see the subdomain there then congratulations, you have successfully created a subdomain.